
Nothing ruins a quiet afternoon quite like spotting a water stain spreading across your ceiling. Roof leaks happen to the best of us, and the key is knowing how to respond without panic.
Start by finding where the water is getting in. Look for missing shingles, damaged flashing around chimneys, or gutters clogged with leaves. These are the usual suspects, and a quick scan from the ground with binoculars can often point you right to the problem.
Once you know what you’re dealing with, shift your attention inside. Place buckets under active drips and lay down tarps to protect floors and furniture. This buys you time and keeps the damage from spreading while you figure out your next move.
For a temporary fix, roofing cement works wonders. Apply it to seal small gaps or cover damaged areas until you can arrange proper repairs.
Acting quickly makes all the difference between a minor headache and a major renovation.
Step 1: Find Where Water’s Coming In
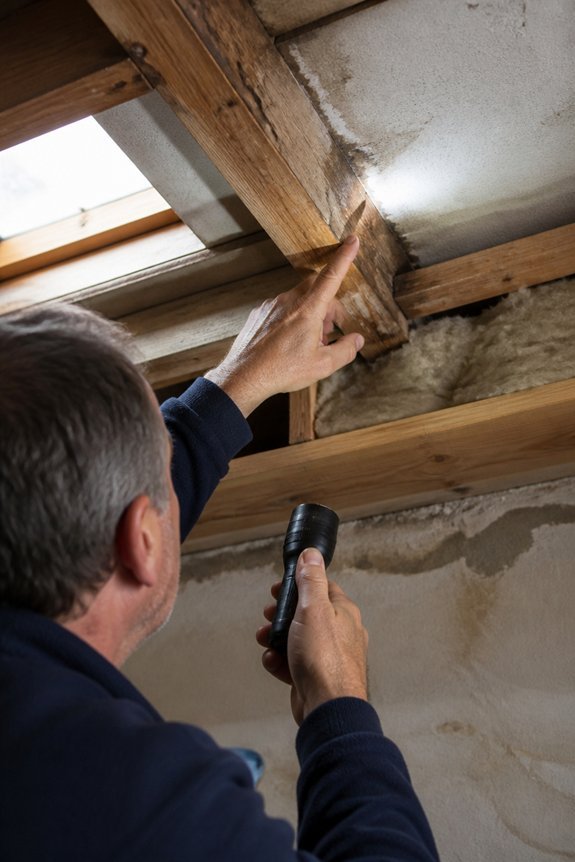
Where exactly is the water entering your roof? Finding the source means checking both your attic and the outside surfaces. Water often travels along rafters, framing, and pipes before it shows up as ceiling stains. The damage you see usually isn’t where the leak actually starts.
Look for missing shingles and cracked flashing around chimneys. Check for damaged gutters and old sealant that has worn away. Inside the attic, search for water stains, mold, and damp insulation. If it’s raining, you can follow the water’s path right to where it’s getting in.
Common leak sources include valley areas where roof sections meet, pipe penetrations and vents, chimney base flashings, dormer edges, and ice dam formations.
Binoculars let you inspect steep sections safely from the ground. Pinpointing the exact entry point saves you from repeated repairs. It also lets you fix the problem directly instead of guessing.
Step 2: Stop Water From Spreading Inside
Once you find the leak source, focus on keeping water from spreading further. Water moves quickly along beams and through drywall. It can damage areas far from where it first entered.
Place buckets or tarps under active drips. This simple step protects your floors from saturation. Open nearby windows and doors to boost air circulation. Fresh air helps moisture evaporate faster.
Remove wet insulation as soon as possible. This prevents mold growth and protects your home’s structure. Position fans to blow directly toward damp areas. Moving air speeds up drying time significantly.
For ceiling leaks, puncture the sagging spot with a nail. Let the water drain into a container below. This prevents larger sections from collapsing.
These quick actions limit water migration. They also reduce repair costs and protect your interior from secondary damage.
Step 3: Patch It Temporarily to Buy Time
Temporary patches buy valuable time while you wait for repairs. Homeowners can use roofing cement, tar paper, or rubber patches to seal small holes. These materials stick to wet or dry surfaces and stop more water from getting in.
Common options include roofing cement applied with a putty knife, self-adhesive rubber patches cut to size, tar paper secured with nails, and waterproof sealant caulk.
Clean, dry surfaces work best for application. Some products still work in damp conditions. These patches usually last several weeks to months. It depends on weather exposure and material quality. This short-term fix prevents more water damage while you arrange permanent repairs.
Frequently Asked Questions
How Much Does Professional Roof Leak Repair Typically Cost?
Professional roof leak repair typically costs between $300 and $1,000, depending on leak severity, roof size, materials needed, and regional labor rates. Simple repairs run cheaper than extensive damage requiring structural work or complete section replacement.
What Type of Roofing Material Lasts Longest and Resists Leaks Best?
Metal and slate roofing materials reign supreme in longevity and leak resistance. Metal roofs endure 40-70 years, while slate lasts over a century. Both withstand extreme weather and moisture penetration exceptionally well.
How Often Should I Have My Roof Inspected for Potential Leaks?
Homeowners should have their roofs inspected at least once annually, ideally in spring after winter weather. Additional inspections are recommended after severe storms, high winds, or hail to identify potential damage early.
Can I Claim Roof Leak Damage on My Homeowner’s Insurance?
Homeowners can typically claim roof leak damage on insurance if the damage results from a sudden, accidental event like a storm or falling tree. Gradual deterioration or lack of maintenance generally isn’t covered by standard policies.
What Preventative Maintenance Steps Reduce the Risk of Future Roof Leaks?
Regular roof inspections are worth their weight in gold for homeowners. Cleaning gutters, trimming tree branches, replacing damaged shingles, checking flashing, and ensuring proper attic ventilation greatly reduce leak risks.
Conclusion
A roof leak is like a crack in a dam, allowing water to seep through and spread damage throughout a home. By identifying the leak’s source, containing water with buckets and tarps, and applying temporary patches, homeowners stop the flow before major structural harm occurs. These swift actions create a window for arranging permanent repairs, transforming a potential disaster into a manageable situation requiring professional attention.