Many homeowners and DIY enthusiasts are drawn to ribbed metal panels because they combine durability, affordability, and a clean, modern appearance. Whether you are installing a roof on a garage, workshop, barn, or even your home, proper installation plays a major role in how well the panels perform over the years.
A metal roof that is installed correctly can provide decades of protection, while even small mistakes can lead to leaks and costly repairs. If you have ever watched a roofing crew and thought the process looked simple, you are not alone. However, success with ribbed metal panels depends on careful preparation, precise alignment, and attention to detail from start to finish.
What Are Ribbed Metal Panels?
Ribbed metal panels are among the most popular choices for roofing and wall applications because they offer excellent strength and water-shedding capabilities. Their distinctive raised ribs create additional rigidity, allowing the panels to span larger areas while maintaining structural integrity.
These panels are available in various materials, including steel and aluminum, and they come in multiple colors and finishes to suit different architectural styles.
Homeowners often appreciate ribbed panels because they deliver long-lasting performance without requiring constant maintenance. They are commonly used on homes, barns, garages, workshops, and agricultural structures.
Their relatively straightforward installation process also makes them attractive to experienced DIYers. Understanding how these panels are designed helps you appreciate why proper installation techniques matter so much for long-term performance.
Ribbed Metal Panel Design Explained
The design of ribbed metal panels includes alternating raised ribs and flat sections. These ribs strengthen the panel while creating channels that direct water away from the structure. This combination of strength and drainage capability allows the roofing system to withstand heavy rain, snow, and strong winds. The profile also contributes to the panel’s distinctive appearance, which many homeowners find appealing.
Although the design appears simple, each rib and overlap serves a specific purpose. Proper alignment of these features is essential for maintaining weather resistance. A poorly positioned panel can compromise water flow and increase the risk of leaks. Understanding the role of the ribs helps explain why careful installation is so important.
Common Uses for Ribbed Metal Panels
Ribbed metal panels are widely used for both roofing and siding applications. Residential homes often utilize them for modern or farmhouse-inspired designs, while agricultural buildings rely on their durability and affordability. Many workshops, garages, and storage sheds also feature ribbed panels because they provide reliable protection with minimal upkeep.
Their versatility allows them to complement a variety of structures and climates. Some homeowners even choose ribbed metal panels as accent features to create a unique architectural look. Regardless of the application, proper installation remains essential for maximizing performance and longevity.
Also read: Galvalume vs Galvanized Metal Roofing: Which Is Better?
Before You Install Ribbed Metal Panels
Preparation is one of the most overlooked aspects of any construction project. Many installation problems arise not because of poor materials, but because the underlying structure was not properly inspected or prepared. Taking the time to evaluate the surface and gather the right materials can prevent headaches later. Careful planning often separates successful projects from frustrating ones.
Check Local Building Codes
Before beginning your project, you should verify local building codes and permit requirements. Different regions have specific regulations regarding roof pitch, fastening patterns, and wind resistance. Ignoring these requirements can lead to failed inspections or costly modifications after installation.
Building codes exist to protect both your property and your investment. While paperwork and permits may seem tedious, they help ensure the roofing system meets accepted safety standards. Spending time on this step often prevents far greater inconveniences later.
Inspect the Roof or Wall Surface
Before installing metal panels, you should inspect the roof deck or wall framing carefully. Any signs of rot, moisture damage, or structural weakness should be addressed before proceeding. Metal panels perform best when installed over a stable and level surface.
Skipping this inspection can create problems that remain hidden until leaks or structural issues appear. Many homeowners discover that repairing underlying damage before installation saves both money and frustration in the long run. A strong foundation is essential for the success of any roofing project.
Measure the Installation Area
Accurate measurements help ensure you purchase the correct number of panels and accessories. Overlooking details such as overlaps, trim pieces, and waste allowances can result in shortages that delay the project. Taking careful measurements also helps reduce unnecessary material costs.
Many experienced contractors recommend double-checking all dimensions before ordering materials. A few extra minutes spent measuring can prevent expensive mistakes and last-minute trips to suppliers. Precision during the planning stage contributes to smoother installation and better overall results.
Tools and Materials You Need
Having the proper tools and materials readily available makes the installation process safer and more efficient. Searching for missing equipment midway through the project can disrupt momentum and increase the risk of errors. Proper preparation helps you work more confidently and maintain consistent progress.
Essential Tools
Basic tools for installing ribbed metal panels include a tape measure, chalk line, drill, impact driver, metal snips, and safety equipment. Eye protection and gloves are especially important because metal edges can be sharp. A sturdy ladder and fall protection equipment are also essential when working on elevated surfaces.
Using the correct tools improves accuracy and reduces frustration. Quality equipment allows you to make cleaner cuts and install fasteners more effectively. Investing in the right tools often leads to better results and a safer working environment.
Required Materials
In addition to the panels themselves, you will need roofing screws with washers, closure strips, flashing, sealants, and underlayment. These components work together to create a weather-resistant roofing system. Although some items may seem minor, they play critical roles in preventing leaks and maintaining durability.
Many installation problems occur because homeowners focus exclusively on the panels while overlooking accessories. Proper trim pieces and flashing are just as important as the metal itself. Paying attention to these details helps ensure the roof performs as intended for many years.
Also Read: 26 Gauge vs 29 Gauge Metal Roofing: Which Thickness Is Best?
Step-by-Step Guide to Installing Ribbed Metal Panels
Installing ribbed metal panels involves a series of carefully coordinated steps. Rushing the process often leads to mistakes that are difficult and expensive to correct. By following each stage methodically, you increase the chances of achieving professional-looking results.
Step 1: Prepare the Surface
Begin by cleaning and inspecting the roof or wall surface thoroughly. Remove debris, repair damaged areas, and confirm that the structure is level and secure. Moisture issues should be addressed before proceeding with installation.
A clean and stable surface provides the foundation for a successful roofing system. Neglecting this stage can compromise the entire project. Taking the time to prepare properly helps prevent future leaks and structural concerns.
Step 2: Install Underlayment or Moisture Barrier
Underlayment serves as an additional layer of protection against moisture and condensation. It should be installed with proper overlaps and secured according to manufacturer recommendations. This barrier helps prevent water infiltration and extends the life of the roof.
Many homeowners underestimate the importance of underlayment until they experience a leak. Even the highest-quality metal panels benefit from this added protection. Investing in a reliable moisture barrier contributes significantly to long-term performance.
Step 3: Install Drip Edge, Starter Trim, or Base Flashing
Drip edges and starter trims establish the foundation for panel placement while directing water away from the structure. Properly installed flashing protects vulnerable areas and enhances drainage. These components may appear simple, but they perform essential functions.
Skipping or improperly installing flashing is one of the most common causes of roofing problems. Paying attention to these details helps ensure the roof remains watertight. Strong beginnings often lead to stronger results.
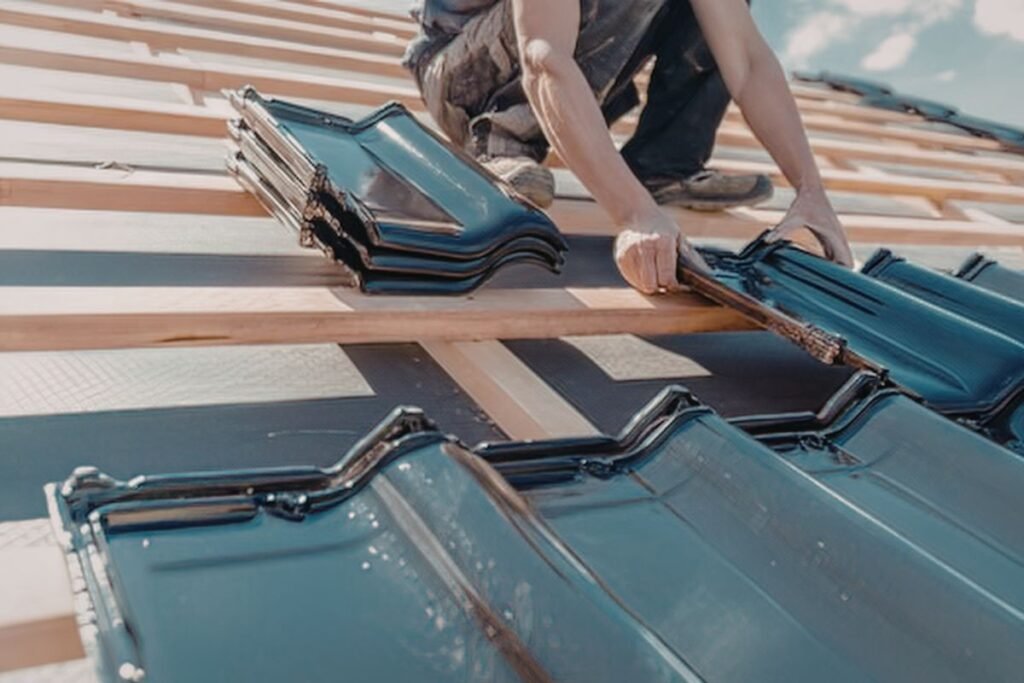
Step 4: Position the First Panel
The first panel determines the alignment of every panel that follows. Carefully position it and verify that it is square before fastening. Starting correctly prevents cumulative errors that become increasingly noticeable across the roof.
Many experienced installers emphasize that patience during this step is critical. A crooked first panel can affect the entire project. Taking extra time to achieve perfect alignment is well worth the effort.
Step 5: Fasten the First Panel
Secure the first panel using the recommended screw pattern and spacing. Avoid overtightening, which can damage the washer and compromise the seal. Proper fastening ensures stability while allowing the metal to respond to temperature changes.
Finding the right balance requires attention and consistency. Screws that are too loose or too tight can create future problems. Following manufacturer guidelines helps maintain the integrity of the roofing system.
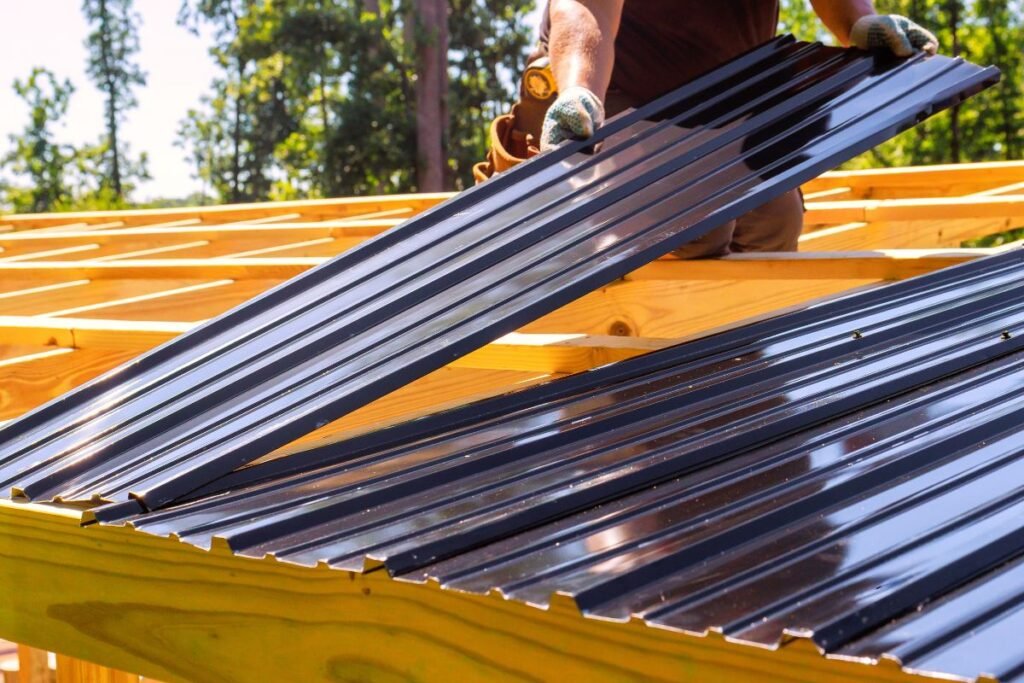
Step 6: Overlap and Install the Next Panels
Subsequent panels should overlap correctly and align with the ribs of the previous panel. Maintaining straight lines and consistent spacing contributes to both appearance and performance. Proper overlaps prevent water infiltration and improve structural strength.
Checking alignment frequently helps avoid noticeable inconsistencies. Small adjustments made early can prevent larger issues later. Precision and patience are essential during this stage.
Step 7: Cut Panels Around Edges and Obstacles
Roof penetrations, vents, and corners require careful measurements and precise cuts. Using quality cutting tools helps create clean edges and maintain a professional appearance. Accuracy is especially important around vulnerable areas where leaks are most likely to occur.
Rushing this stage often leads to wasted materials and frustrating corrections. Taking your time and measuring carefully improves both aesthetics and functionality. Attention to detail pays dividends over the life of the roof.
Step 8: Install Flashing and Trim
Flashing and trim pieces protect edges, ridges, and transitions from water intrusion. Ridge caps, gable trim, and corner flashing should be installed according to manufacturer specifications. These components not only improve performance but also enhance the finished appearance.
Many homeowners underestimate the importance of trim until they see how much it contributes to the overall look. Properly installed flashing creates a polished and professional result. It also plays a crucial role in weatherproofing the structure.
Step 9: Seal Joints and Penetrations
Sealants should be applied around penetrations, seams, and other vulnerable areas. Using approved products ensures compatibility with the roofing materials and provides long-lasting protection. Inspect screw washers carefully to confirm they are sealing properly.
This step helps prevent minor openings from developing into major leaks. Investing time in sealing critical areas adds an extra layer of security. Small details often determine the overall success of the project.
Step 10: Inspect the Finished Installation
Once installation is complete, conduct a thorough inspection. Check for loose fasteners, alignment issues, and gaps in flashing or sealant. Addressing minor concerns immediately prevents larger problems later.
A careful final inspection provides peace of mind and ensures the roof is ready to face years of exposure. Many professionals consider this step just as important as the installation itself. Taking pride in the finished product contributes to long-term satisfaction.
Important Installation Tips for Ribbed Metal Panels
Following manufacturer instructions is essential because different panel profiles may have unique requirements. Proper screw placement, closure strips, and expansion allowances all contribute to performance. Even experienced installers rely on product-specific guidelines to avoid costly mistakes.
Another important consideration involves walking on the panels. Unsupported areas can dent easily, so you should step only where recommended. Planning for thermal expansion and using the correct fasteners also helps maintain structural integrity over time. These seemingly small details often determine whether the roof performs flawlessly or develops issues later.
Installing Ribbed Metal Panels on a Roof vs Wall
Although the panels themselves may be similar, installation techniques differ depending on whether they are used for roofing or siding. Roof applications require careful attention to drainage, flashing, and slope. Proper ridge caps and eave protection are essential for preventing water infiltration.
Wall installations focus more on vertical alignment and trim around windows, doors, and corners. The overall principles remain similar, but the details vary significantly. Understanding these differences helps ensure the finished structure performs effectively and looks professional.
DIY Installation vs Hiring a Professional
Many homeowners successfully install ribbed metal panels on small structures such as sheds and garages. Simple projects with minimal penetrations are often manageable for experienced DIYers. Completing such projects can be deeply satisfying and provide significant cost savings.
However, steep roofs, large homes, and complex flashing details usually require professional expertise. Roofing work involves safety risks and technical challenges that should not be underestimated. Hiring experienced contractors often proves worthwhile when dealing with complicated installations.
Maintenance After Installation
Proper maintenance helps preserve the appearance and performance of ribbed metal panels. Periodic inspections allow you to identify loose screws, damaged washers, and deteriorating sealants before they become serious problems. Keeping gutters and roof surfaces free of debris promotes effective drainage and reduces moisture accumulation.
Many homeowners appreciate how little maintenance metal roofs require compared to traditional materials. Nevertheless, occasional attention helps maximize their lifespan. A few simple inspections each year can contribute to decades of reliable performance and lasting peace of mind.
Frequently Asked Questions
Can you install ribbed metal panels yourself?
Yes, experienced DIYers can handle simple projects, though complex roofs are best left to professionals.
Do ribbed metal panels need underlayment?
Yes, underlayment provides important protection against moisture and condensation.
How much should ribbed metal panels overlap?
The required overlap depends on the manufacturer and panel profile.
Where do screws go on ribbed metal roofing?
Follow the manufacturer’s instructions for proper screw placement.
Can ribbed metal panels be installed over shingles?
In some cases, yes, depending on local building codes and roof conditions.
Do you need closure strips for ribbed metal panels?
Yes, closure strips help prevent water, insects, and debris from entering gaps.
How long do ribbed metal panels last?
With proper installation and maintenance, they can last 40 years or more.